Saturday, August 13, 2011

Don't Say I Can't Do Something

So, I've been called out again for not keeping up with the blog. Too much is going on! Things are finally starting to happen with the house right at the time that I have to go back to work. Between getting everything ready at school, keeping our current house clean (it's on the market), working on the house, and keeping Nate from killing the cat, I just haven't found the time to update the blog. But, excuses, excuses.

I know you probably think this blog has turned into an epic adventure. Joe and I are the heroes in the story and our nemesis? Well, let's just call him, "He who shall not be named." Hint, hint...it's on the floors...and it's black. Well, I'm here to tell you that several battles were fought. Blood and brain cells were lost. The war is over, and the heroes once again emerge victorious.


Sooooo many people told us it couldn't be done. Even more people looked at us with crazy eyes when we told them what we were doing. It can be done...WE DID IT!

Check back later for more pictures and a play-by-play of the action.

Monday, July 25, 2011

Primed and Ready to Go

Are you ready to see the finished walls? I like pretending this is a big reveal so I can finally feel some sense of accomplishment. Up to this point we've only been demolishing everything. We've ripped up carpet, ripped up linoleum, pulled out staples, tore down wallpaper, and demolished a bathroom. I needed these walls to look pretty. I needed it bad.

They aren't perfectly smooth. They have character though. I have to remind myself that this house is 73 years old. You don't move into a 73 year old house and expect everything to be even, square, smooth, working, not falling apart, livable, etc.

So, I am a very big fan of these walls. Hubs and I put our brains together to pick the color. We make all wall color choices together. I blame this on the fact he was forced to grow up in a house with lots of purple floral wallpaper but that's a story for another day. We decided on Stone Mason Gray by Valspar but it ended up looking a lot more blue than gray. We still like it nonetheless.

So here it is...


Saturday, July 23, 2011

Joint Compound = Shiny New Walls

Remember these scary walls?

They now look like this...

How did this happen you ask? Easy! (Well, not quite.)

First, we used my uber awesome steamer to steam off what was left of the wallpaper adhesive and washed down the walls. We let them dry for 48 hours. Next, I went around and scraped off all the loose plaster and paint and sanded it all down with a hand sander. (Not fun but necessary.) Then, hubby went around with joint compound and skimmed over all the holes and cracks.

We let the joint compound dry for 24 hours then went back to check on our work. I was totally impressed by hubby's skimming skills. The walls were pretty smooth but still needed a little sanding. So we busted out our hand sanders and went to town smoothing down all the rough patches and uneven spots. (**very important to wear safety goggles and masks-safety first in the Lyon household)

We used our shop vac (recent purchase) to "contain" the dust. <--I just made a joke. Anyone who has done this before knows there isn't any containing of the dust. It gets everywhere! I'm still sneezing even after wearing a mask the entire time.

We did a little Internet research (aka Google) and found a primer with really good reviews. We used Zinsser Bullseye 123 Primer. It was awesome! I was so high after painting that room that I was seeing stars...and the walls looked great too. It covered all the stains and sealed the walls nicely. We ended up buying the 5 gallon bucket because we will be using it in every room in the house. So much to look forward to...

Thursday, July 21, 2011

Hello Walls


The wallpaper is gone and if you read the last post you got a sneak peek of what the walls look like. Scary. Since I've lost my camera I can't show you pictures of the awesome 1940's wallpaper that was under three other layers of wallpaper. I can, however, use my mad writing skills to describe each layer in detail (from the top):
1. "Civil War" paper - I'm not describing it...you've seen it.
2. Pink Spinning Wheel paper - exactly as it sounds...pink...with spinning wheels on it...very, um...colonial?
3. Green/Blue/Gray patterned paper - actually was more like flowers
4. Awesome vintage 1940's paper. OMG Awesome. Can't understand why they ever covered it up. We didn't get to see it all, just bits and pieces. It was just so fragile. It featured big apple trees, cherries, a cow, goats, sheep, a dove sitting on a wheelbarrow, chickens. I was so sad to see it go but it just flaked away. I wanted to save a little to frame but it was so badly aged with three layers on top of it and there was no way to get it off without wetting it...I promise we tried.
5.Pink Paint
6. Robin's Egg blue paint / falling plaster

Thankfully, all these layers were just on one wall. Everything else was just the blue/falling plaster. My friend Dana got that wall. She worked for at least two hours steaming and scrubbing that wall. LOVE YA DANA! Here's her finished product.

Funny story: Dana was washing the wall with a very wet sponge when she started to hear a crackle. See that outlet near the floor. Yep. She had been pouring water into it for 30 minutes. She almost solved all my problems for me.

Tuesday, July 19, 2011

Climbing the Walls

To quote They May Be Giants:
"I got tired of pacing the floor
Sick of it all, I'm done with the floor
Walked away ever since I got a new job climbing the walls . . . "

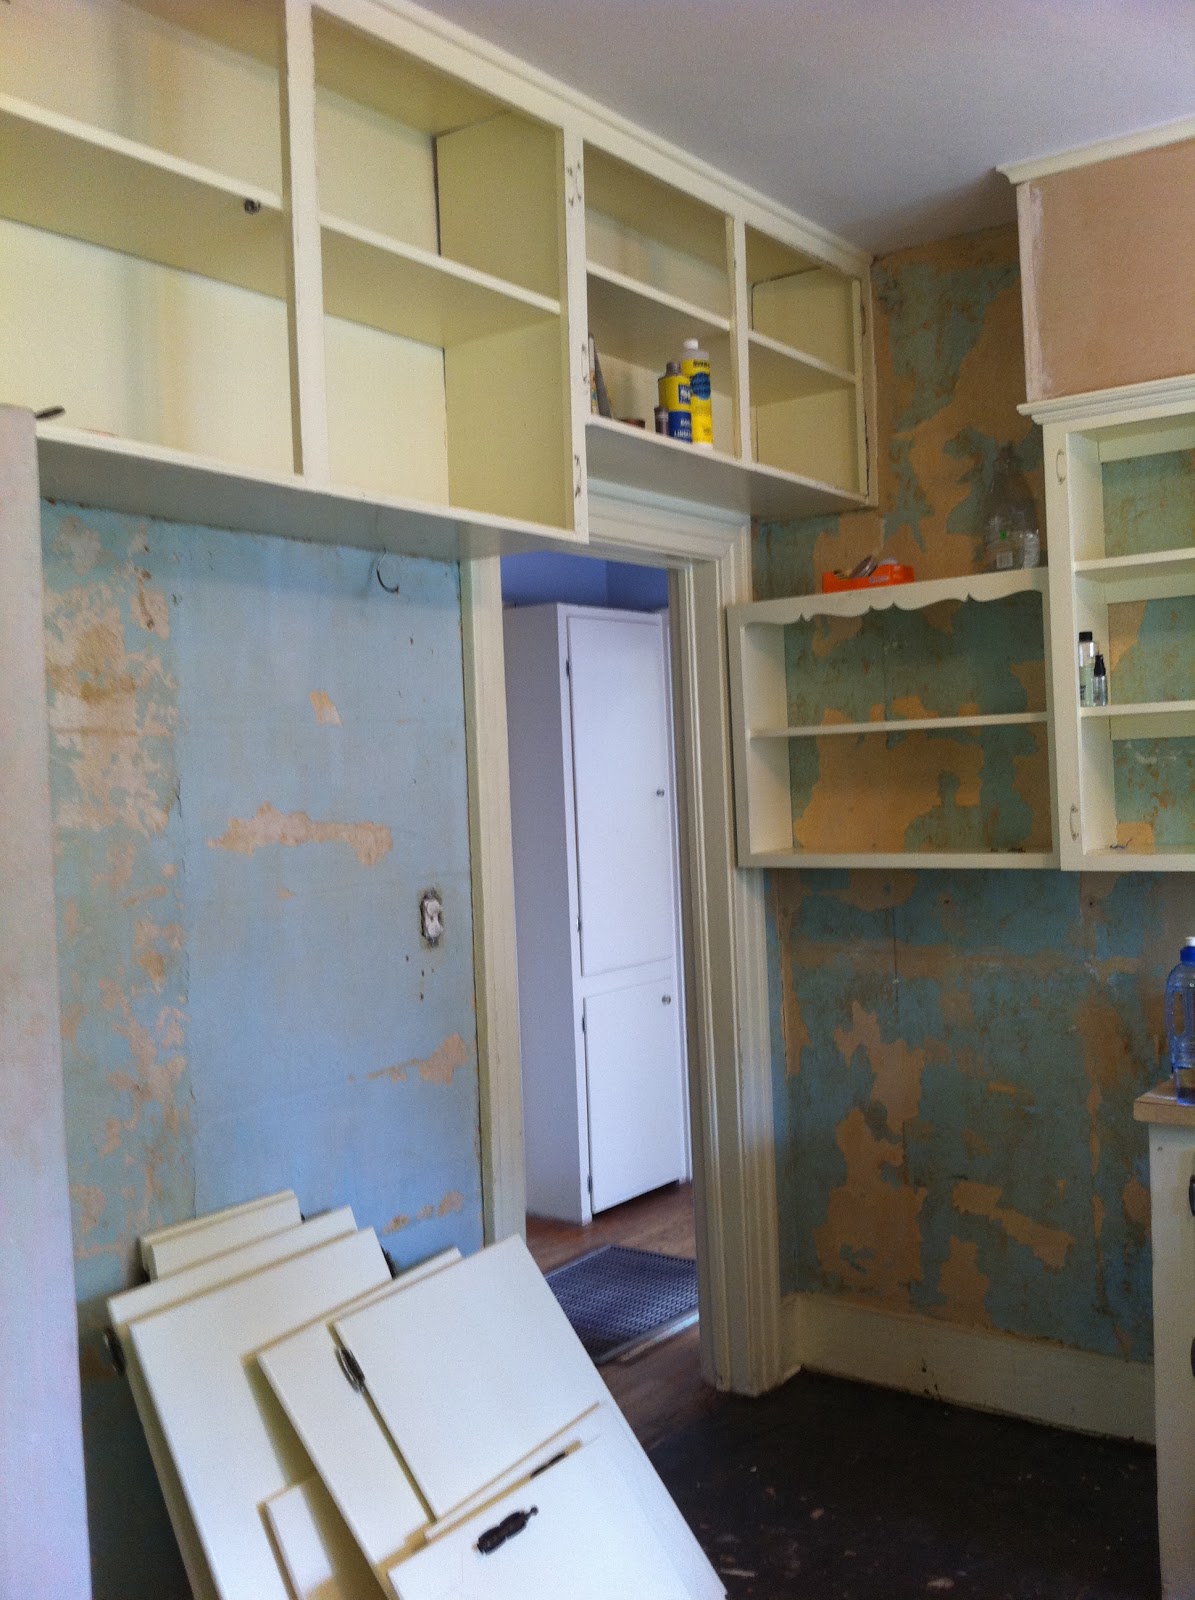
Now that the floors are at a stopping place (for now) we've decided to tackle the next huge kitchen project...the walls. Here's what they used to look like:
As much as I despised  loved the wallpaper, we decided that it just wasn't the look we were going for. Luckily for us each strip of wallpaper came down in an entire piece (no steamer necessary). I neatly folded them up, put them in a bag, and have left them out on the curb for the garbage man. Feel free to drop by and salvage it. I'm sure it would just look lovely in your kitchen/bathroom/bedroom. You could even frame it and put it above your mantel.

Here's what the walls look like now...more to come.


Sunday, July 17, 2011

I'm in Love with a Stripper

Well, actually it's a wallpaper steamer but stripper was more fun to type. Are you singing it with me?

If it wasn't in your head, it is now. Ha ha ha!
So, you've seen the tragedy that is our kitchen floor. To recap, it was two layers of linoleum and two layers (because one just wasn't enough) of tar paper over oak floors. After hubby scraped up the linoleum he handed me knee pads and said, "You want wood floors? Have fun! Peace!" Since then it's been my responsibility to find a way to get rid of all the tarpaper.

After about 20 hours of work (no, not all at one time) its finally done. What was my secret? A wallpaper steamer. I went to the big box store and bought myself a nice multipurpose steamer with a wallpaper removal attachment. Below is the particular one I chose.
It's a Wagner 905 Power Steamer. It guarantees to remove wallpaper "the first time every time." I decided it would be my weapon in the epic battle against tarpaper.

Using the attachment intended for wallpaper, my gardening cushion (achy knees = no bueno), and a putty knife I attacked that tarpaper. The steamer holds about one hour's worth of water/steam and I filled it up roughly 20 times.

I'm not ready to show pictures. The floor still looks awful. I got all the tarpaper off but there's still lots of adhesive. Originally I was steaming until everything came off, tarpaper and adhesive. But after I broke into tears the 50th time, my dad decided to call a floor guy he knows. The floor guy promised we could sand the adhesive off but removing the actual tarpaper was necessary. Fingers crossed he knows what he's talking about.

Self-affirming mantra: "They'll be pretty when they're done." --This is actually what I say about everything house related.

Monday, June 13, 2011

Ding! Dong! The Carpet is Gone!

Can you believe I'm posting twice in one week?!? One week into summer break and I've just got a small case of cabin fever.

So, onto today's post. THE CARPET IS GONE! All the nasty, dingy, staple-filled, wall-to-wall carpet (that Grandmother was so proud of) has been ripped out of the house. Underneath are beautiful oak floors full of staples and just waiting for someone to love them. Everytime we mention to Grandmother how beautiful the wood floors are she just stares at us and says, "I don't understand why you would want those old wood floors. They aren't even very good quality. I just loved my wall-to-wall carpeting." She views the wood floors as "working class floors." I have to remember that 50 years ago almost everyone had wood floors and wall-to-wall carpet was the ideal.

But carpet just kind of grosses me out. Maybe its because I have a toddler, two dogs, and a cat but I just can't help thinking of all the little microrganisms breeding under the surface of carpeting. They just never seem clean to me. I can vacuum every day and carpet scrub once a month and I still feel like it's just dirty.

Anyway, we ripped carpet out of the living room, dining room, two bedrooms, and the hallway. I feel so much better about the entire space. It was the end of the day and we just wanted to get it over with so we just started ripping and rolling. You've heard me complain about the staples in the living room, dining room and one of the bedrooms. Well they continued through the hallway. When we got into the back bedroom, however, the carpet changed from beige to blue. And guess what...no really...guess...oh all right I'll tell you, better yet, I'll show you.

Instead of that nasty composite foam stuff, there was this. Equally nasty but not stapled down to the floor (insert squeal of excitement). I'm guessing it was once foamy and cushiony but now it is brittle and flat. It was just laying on the floor like that. We were able to just pick it up and neatly roll it inside the carpet.

And here's what we were left with...

Ahh...